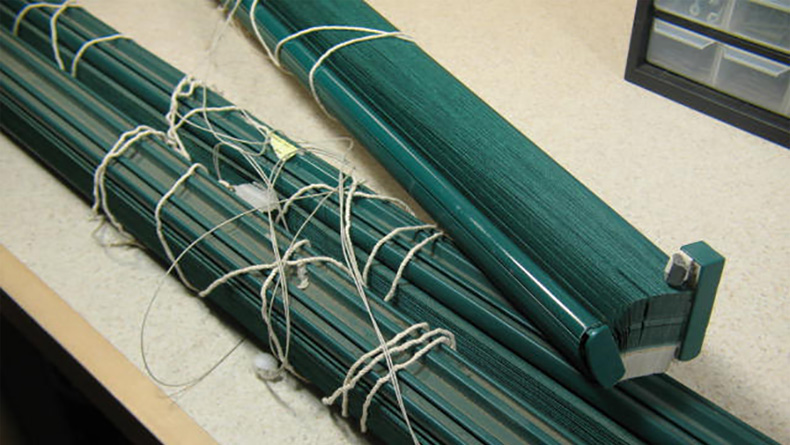
The replacement of broken or frayed lift cord is one of the most common window blind repairs.
Cords often break as the result of normal wear and tear or from exposure to the sun. They can also be damaged through repeated contact with a damaged or defective part on the blind or shade itself.
The repair is easy and inexpensive.
It’s likely that your blind or shade still has a lot of miles left in it and you can save quite a bit of money by taking the time to do this simple repair yourself.
There are some differences between brands, but the basic procedures remain pretty much the same. If you pay attention when you take the blind or shade apart, you won’t have any trouble putting it back together again.
Inspect the cord guides and cord lock for excessive wear.
This is one topic that deserves more emphasis than it usually receives.
If your shade has defective or damaged parts that come into contact with your new replacement cords it won’t be long before the cords are broken again.
You won’t be happy when that happens.
Now is the time to perform a thorough inspection of the old parts to identify and replace all of the bad ones while you already have the shade taken apart. Here are some things to look for….
Check for damage to the cord guides.
In many cases a shade cord guide will show a small amount of wear where the lift cord has cut into the plastic of the guide during normal operation.
Rotating the guide by 180º so that the cord runs over a smooth, undamaged surface is a good idea.
However, sometimes the damage is more severe than that.
The photos below show parts from a shade where the cord has cut so far into the guide that the part had to be replaced.
The important thing to remember about this is that while the cord was cutting into the guide, the guide was also cutting into the cord and probably had a lot to do with the failure.
If you try to reuse a part like this there’s a chance that your new replacement cord won’t last very long.
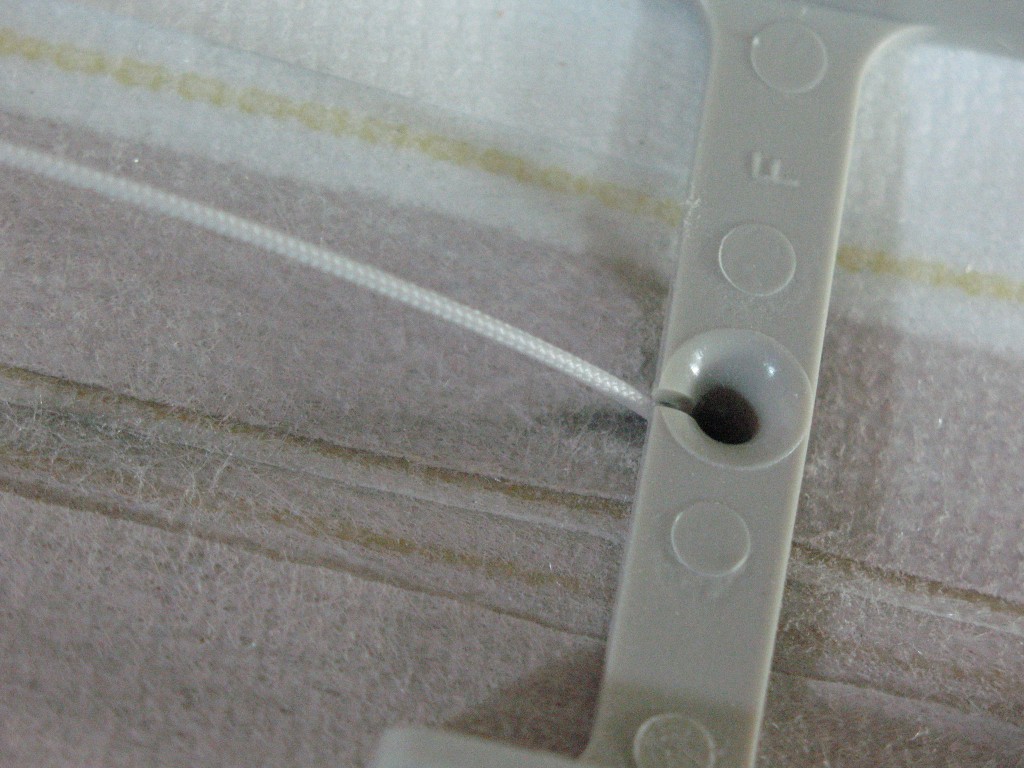

Check for damage to the fabric stiffeners.
If you look closely at the previous photo, you will see that the cord had started cutting into the shade fabric too.
On this shade a thin aluminum strip similar to a mini blind slat was used as a stiffener inside the top pleat and the cord cut right through that as well.
Even though it is only 0.9 mm in diameter, that cord is some tough stuff.


Check for damaged cord locks.
You don’t often hear much about this, but damaged cord locks are much more common than damaged cord guides. Be sure to inspect yours carefully when you have it out on the workbench.
Here are some photos of examples of what you might expect to find.
These cord locks are all from Hunter Douglas Duette cell shades, but many brands use this same style of cord lock and experience the same kind of wear.
I’m sure you can see that if you were to start dragging your brand new replacement cord through one of these old grooves that it might not last too long.


And here’s one that’s really pretty extreme. I only show it because it’s so impressive just how strong blind lift cord really is.
All the more reason to protect your children or pets from becoming entangled in it. Be careful with this stuff, it’s surprisingly strong and it can be dangerous.
